
Over numerous years of birthdays and other occasions that require a cake as part of the celebration, I have noticed how much cake children waste. My children (mainly the younger ones), will often do no more than lick the icing and then hand the cake to me! I do love cake, but there is only so much that I can eat.
One year I tried out serving an ice cream cake in cones instead of a traditional cake, and found that there was far less wastage and my children loved it. As such an ice cream cake of some description has become the most requested cake for family celebrations, with the Honeycomb version being the most popular.
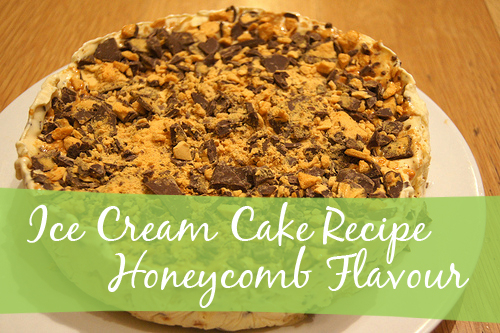
Ice Cream Cake Recipe – Honeycomb Flavour
Ingredients:
- 2 litres good quality ice cream (Home brands etc tend not to refreeze as well, or you could be completely conscientious and make your own ice cream! I use Cadbury Full Cream Vanilla.)
- 2 x 250 grams Chocolate coated honeycomb. (I do use home brand for this and have found it to taste just as good in the cake.)
- Cling Wrap
- 20cm or 25cm Spring form cake tin
Instructions:
- Remove ice cream from freezer and place into a large bowl. Cut up into chunks, to aid mixing. I like to rinse the container and keep it to store any leftover cake that there maybe airtight back in the freezer.
- Place honeycomb into a plastic bag and tie a knot in it. Using a rolling pin or like item, crush the honey comb into small chunks.

- Cut remaining honeycomb into half and set aside. EDIT: I now crush all the honeycomb, place about two thirds in the cake mixture and 1/3 on top of the cake, so it ends up looking like the top photo.

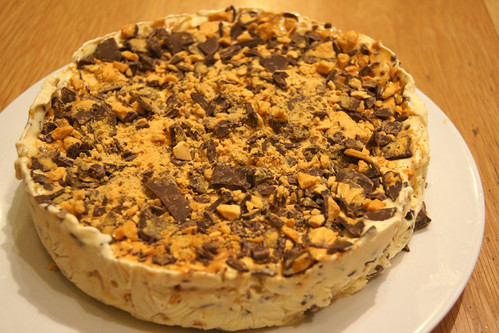
- Line the spring form tin with cling wrap. Make sure that the entire inside of the tin is lined with cling wrap, to allow for the cake to be easily removed. I have made the cake in both a 20cm tin and 25cm tin and both work well. The cake in these photos was made in a 25cm tin.

- Add crushed honeycomb to ice cream and mix thoroughly.

- Pour ice cream mixture into lined spring form tin and smooth out.

- Decorate the top of the cake with remaining honeycomb.

- Carefully cover all of the cake with cling wrap to ensure that ice doesn’t form on top of the cake when it refreezes.
- Place tin in the freezer for at least four hours. I generally make this one day or more in advance, which is another reason why I love this cake. It can be in the freezer a number of days before you need it and still taste great.
- Remove from freezer when cake is required, undo spring form and peel back cling wrap. The 20cm will be a little harder to serve than the 25cm because of its thickness, so if you are wanting to cut the 20cm cake into nice slices, then remove it 10 minutes (weather dependent of course!) or so before you wish to cut it.
- Enjoy your cake! For children’s parties I generally serve in ice cream cones, but it can easily be cut into slices and served on plates/bowls.
Do you have a sneaky ice cream cake recipe that looks great but is super easy to make?
Ice Cream Cake - Honeycomb Flavour
Author:: PlanningQueen
Recipe type: birthdays
Ingredients:
- 2 litres good quality ice cream (Home brands etc tend not to refreeze as well, or you could be completely conscientious and make your own ice cream! I use Cadbury Full Cream Vanilla.)
- 2 x 250 grams Chocolate coated honeycomb. (I do use home brand for this and have found it to taste just as good in the cake.)
- Cling Wrap
- 20cm or 25cm Spring form cake tin
Method:
- Remove ice cream from freezer and place into a large bowl. Cut up into chunks, to aid mixing. I like to rinse the container and keep it to store any leftover cake that there may be airtight back in the freezer.
- Place honeycomb into a plastic bag and tie a knot in it. Using a rolling pin or like item, crush the honey comb into small chunks.
- Line the spring form tin with cling wrap. Make sure that the entire inside of the tin is lined with cling wrap, to allow for the cake to be easily removed. I have made the cake in both a 20cm tin and 25cm tin and both work well.
- Add two thirds of crushed honeycomb to ice cream and mix thoroughly.
- Pour ice cream mixture into lined spring form tin and smooth out.
- Decorate the top of the cake with remaining honeycomb.
- Carefully cover all of the cake with cling wrap to ensure that ice doesn't form on top of the cake when it refreezes.
- Place tin in the freezer for at least four hours. I generally make this one day or more in advance, which is another reason why I love this cake. It can be in the freezer a number of days before you need it and still taste great.
- Remove from freezer when cake is required, undo spring form and peel back cling wrap. The 20cm will be a little harder to serve than the 25cm because of its thickness, so if you are wanting to cut the 20cm cake into nice slices, then remove it 10 minutes (weather dependent of course!) or so before you wish to cut it.
- Enjoy your cake! For children's parties I generally serve in ice cream cones, but it can easily be cut into slices and served on plates/bowls.