
I always have so many people ask about how to make kombucha when I post the photos of my homemade kombucha. I have been making kombucha at home for about five years now and I must thank my friend Bron for providing me with my first SCOBY to start the process.
Bron also sent me a link to a recipe online by Ivy who at the time had a blog called Paleo in Melbourne. Ivy no longer runs the blog but I got in contact with her and asked if she would be okay with me sharing the recipe I use, based off her recipe.
Ivy kindly said yes! Ivy has a great instagram account which you can follow here – Real Food Agenda. Her photos and stories from her trip to the Arctic at the beginning of the year were amazing, so definitely check those out!
If you prefer step by step photos – read on! But if you just want to get to the recipe in Australian measurements click here to head to the bottom of the post for a printable version of the recipe.

To make your brew of kombucha you will need to have a SCOBY. A SCOBY is an acronym for symbiotic culture of bacteria and yeast. The SCOBY is the living home for all the good bacteria and yeast which will transform the tea into fizzy kombucha. You can get a SCOBY from a friend or buy on online or you can make your own.
The first step is to add your tea bags and sugar to a glass jar, then pour in boiling water. The ratios of the ingredients are as follows:
- 2 green or black tea bags per 1 litre – I have used organic and non organic
- ¼ cup sugar per 1 litre – I have used organic raw and simple white sugar and both have worked fine
- Water – most people recommend using filtered water and I did in the beginning, but now just use tap water most often. It would be better to use filtered if you can (removes the chemicals in our tap water)
- SCOBY – symbiotic culture of bacteria and yeast, 1 per jar
- 100mls starter tea – this is the Kombucha tea from your previous batch

You stir the tea and sugar until it dissolves and you let the tea brew for at least 30 minutes, but generally I leave it for a couple of hours.
You then remover the tea bags and top up with cold water. You need to leave plenty of room for the SCOBY and starter tea you will add next.
Be mindful not to have the tea filling up to the top of the jar. Aim to have at least an inch of room at the top.
Using a wooden spoon, scoop up a SCOBY and transfer it to the jar. You will know if the tea is the right temperature, by testing if it is similar to the starter tea the SCOBY is sitting in. The tea in the jar shouldn’t be too much hotter or colder than what the SCOBY is currently sitting in.
Pour in some of the tea from the previous batch – this is known as starter tea. As you can see in the picture it is full of good bacteria that will help with the fermentation process of the next batch.
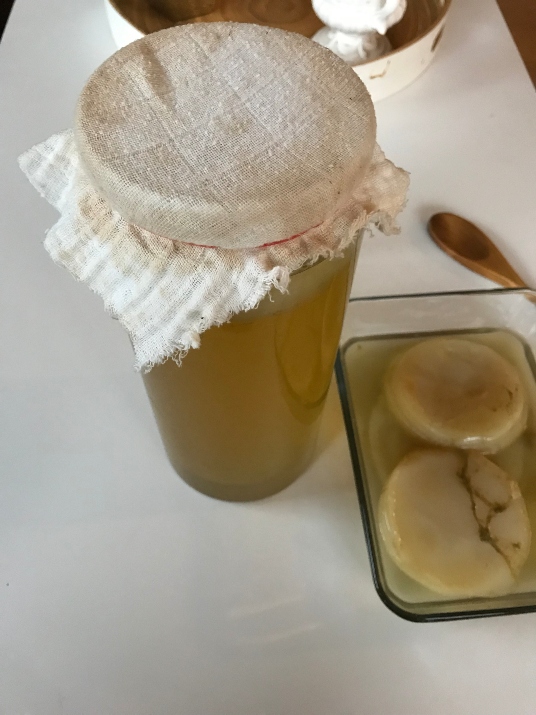
You then place a muslin wrap on top of the jar and fix with a rubber band. Place the kombucha jar somewhere away from direct sunlight but that is well ventilated. (It should not be placed in a cupboard with the door closed.)
Fermentation takes at least 7 days and up to about 30 days. I tend to make my next batch from the brew somewhere between 21 and 30 days as I find the fizz to be the best then.
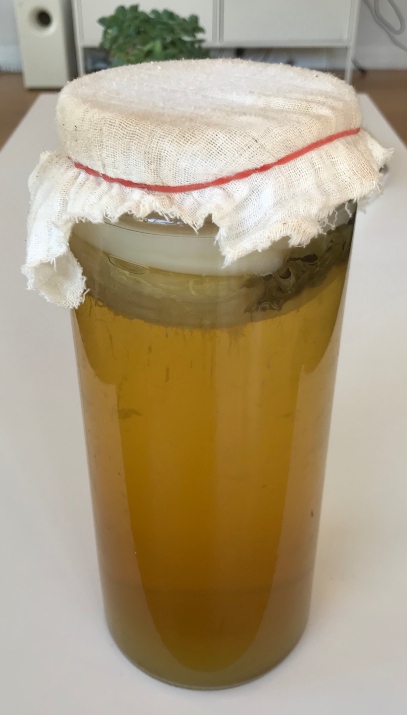
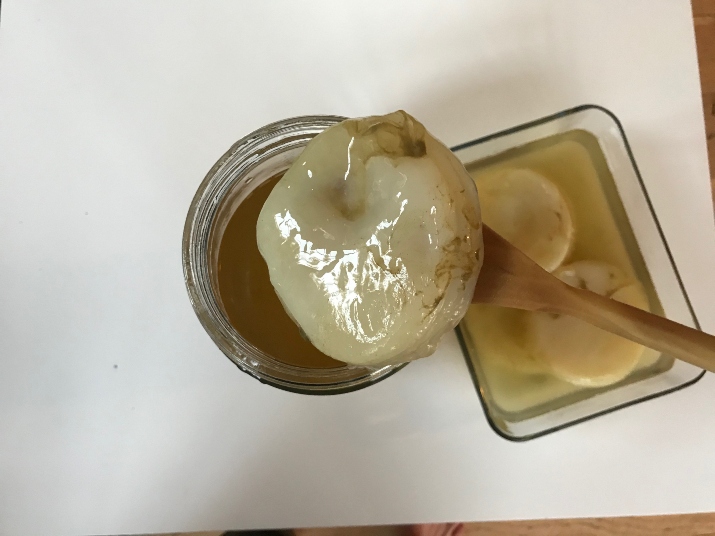
When you are ready to brew your next batch, get your kombucha out. This photos is of a brew of kombucha that has been fermenting for three weeks. You can see that the SCOBY has multiplied! There are now two thick healthy SCOBYs in this jar.
The SCOBY feeds on the sugar that is in the tea brewed and this is used to create another SCOBY. This is how while sugar is a key ingredient in making SCOBY, but the end product of the komucha tea has actually very little sugar in it.
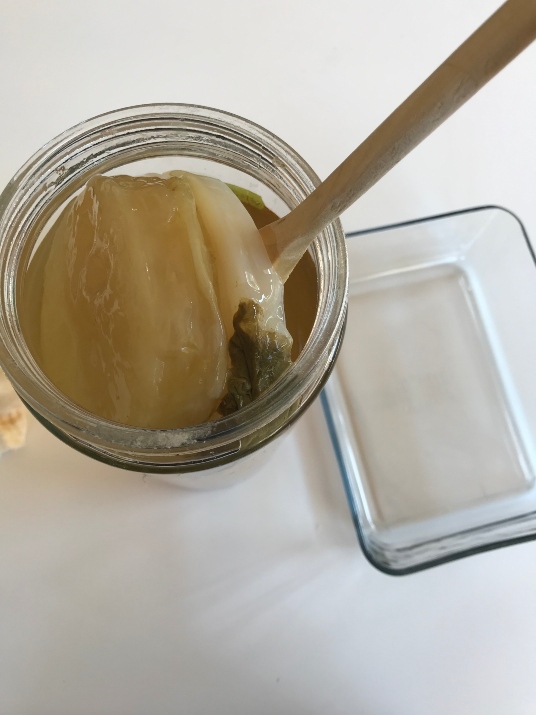
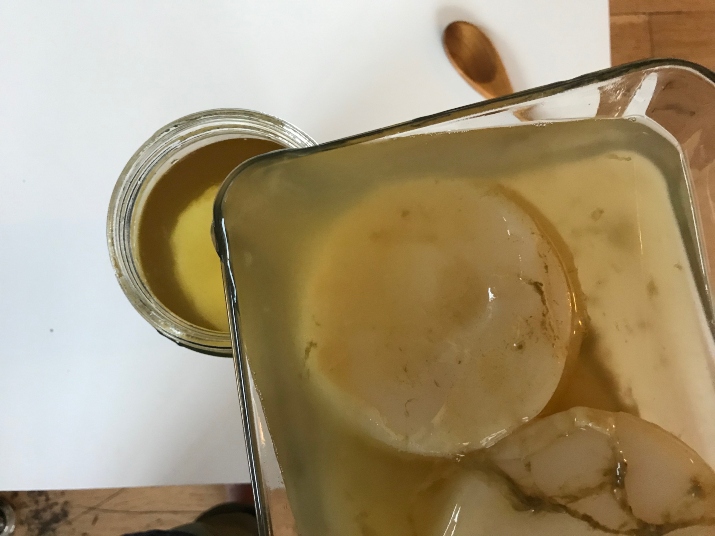
The first step is to remove the SCOBY using a wooden spoon. Have a non metal container ready (that has a lid) to store the SCOBY while you undertake the rest of the kombucha making process. The SCOBY does not like metal.
You can keep both SCOBYs in the same container and you could brew two jars of kombucha next time, or you might like to separate the SCOBYs into different containers. You could give one to a friend so they can start making their own kombucha!
The SCOBY is “alive” so you need to pour some of the kombucha tea into the container so the SCOBY stays healthy and has starter tea for the next batch. If you have separated the SCOBYs into two containers then you will need to pour starter tea into both of them.
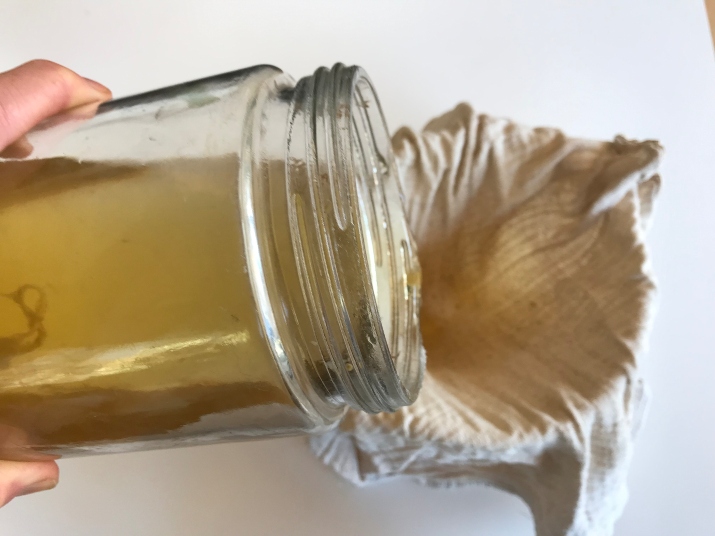
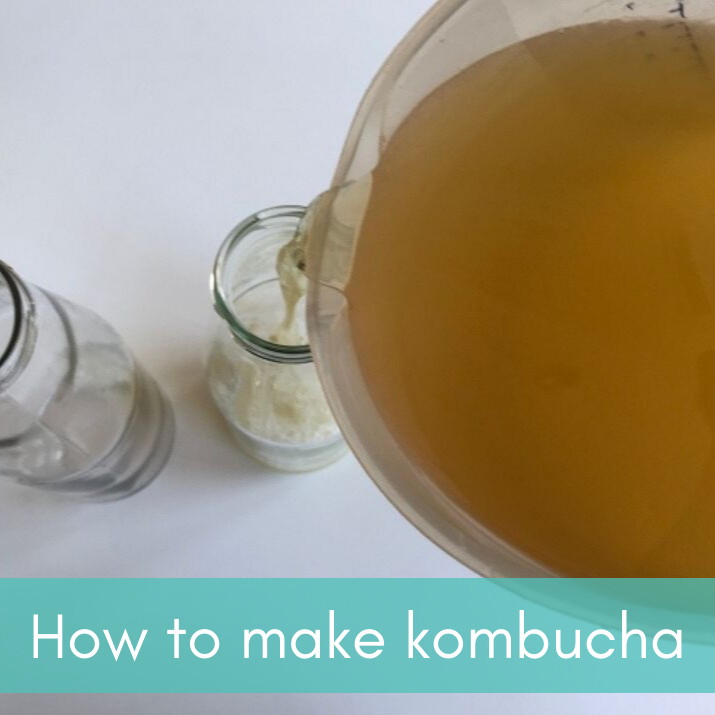
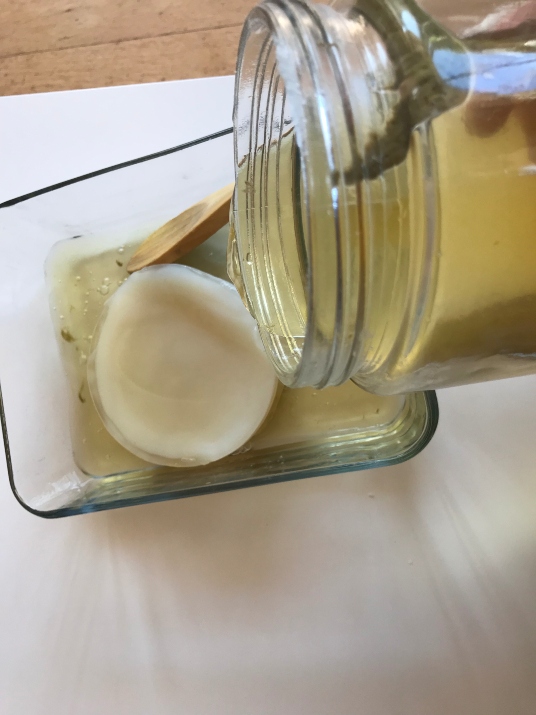
To get the kombucha ready to bottle, I place some muslin cloth over a large jug, to strain the kombucha. I have cut up old muslin baby wraps and they are perfect for this.

I then pour the kombucha into old passata jars. You can see the lovely fizz in this photo!
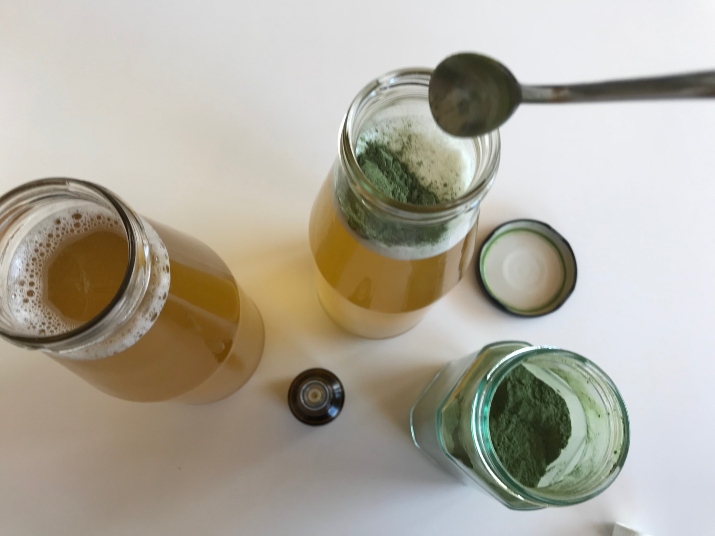
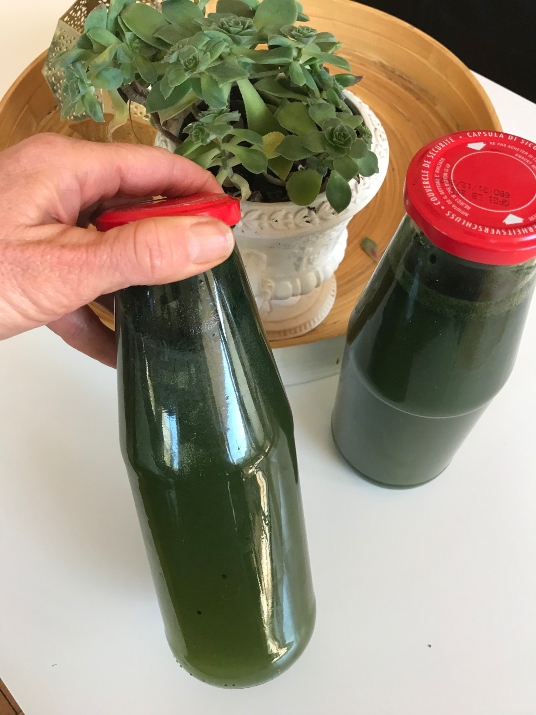
It is at this point that you add the flavourings to your kombucha. I am quite obsessed with a combo of greens powder and essential peppermint oil at the moment, but other flavours I like are:
- grated ginger, grated turmeric and black pepper
- ginger and torn mint leaves
- raspberry (I have used frozen and fresh)
- mixed berries – strawberries, raspberries and blackberries
- original – the youngest likes unflavoured kombucha so we always leave a few plain for him
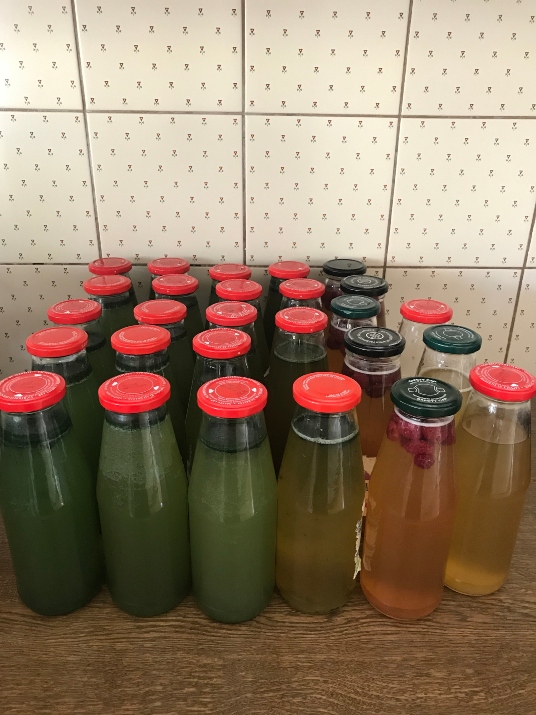
You need to have air tight bottles for you kombucha to keep the fizz in. This next phase is known as the second fermentation. This allows the kombucha to absorb and intensify the flavourings you have added and regain some fizziness.
Leave the bottles in a cupboard or out of direct sunlight for 2 – 3 days to ferment. You can leave them in the cupboard the whole time, (I do), but you just need to be careful as they could explode if the temperature rises and is very high for consecutive days.
I know many people who have had kombucha explode on them. Cold slows down the fermentation process, so you can store kombucha in the fridge to avoid explosions!
For the bottles that have pieces of fruit or ginger etc in them, I just strain them as we drink the tea.
How to make kombucha – Australian measurements
Kombucha
Equipment
- 2 litre glass jar
- muslin cloth x 2
- elastic or rubber band
- glass bottles
Ingredients
- 4 – 5 green or black tea bags
- 0.5 cup sugar
- 1 SCOBY
- 100 mls starter tea
- water
Instructions
- Add sugar and tea bags to your jar.
- Add boiling hot water so the container is at least half full.
- Stir with a wooden spoon to so sugar mixes and dissolves. Let steep for at least 30 mins.
- Use a wooden spoon to remove tea bags and then add filtered water, but leave room at the top for starter tea and room for SCOBY to breathe.
- Once the new brew of tea is the same temperature as the starter tea the SCOBY is sitting in, you can add the SCOBY with its starter tea.
- Cover with muslin wrap or a tea towel and use a rubber band to secure.
- Put the kombucha somewhere away from direct sunlight but that is ventilated.
- Allow the tea to ferment for at least 7 days and up to 30 days. Temperature affects the fermentation process, so longer is better in colder months. I usually leave mine for about three weeks.
- Once the kombucha has fermented for long enough, remove the SCOBYs from the jar and set aside in a glass container. Pour some starter tea into the SCOBYs.You can either keep both SCOBYS and use the second SCOBY to make another jar of kombucha or you can give it to a friend. Each brew of kombucha will result in additional SCOBYs.
- Place some muslin cloth over a large jug, to strain the kombucha.
- Pour the kombucha into bottles (I use old passata bottles).
- Add the flavourings to your kombucha, then place lid on and allow to ferment for 2 – 3 days.
- Kombucha is a fizzy drink, so if it is stored in a warm place for too long, it can explode. Keep it in a dark cool place or refrigerate depending on your climate and how soon you will drink the tea.