
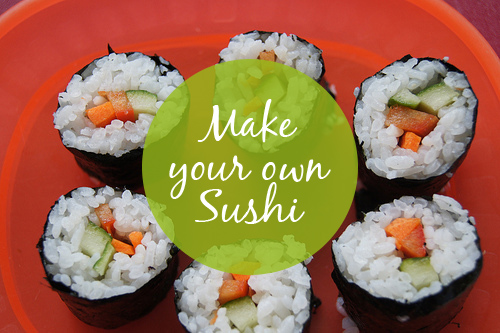
I had been wanting to make sushi for the kids lunches for quite a while. I had all the ingredients sitting in the cupboard, but just wanted to find time when I could make them with the kids, especially our 6 year old who adores sushi. It took a little bit of practice to get our sushi to look right, but we did get there in the end and even the ones which didn’t look quite right still tasted great. I imagine our technique is not the text book way to make your own sushi, but we did have fun and they went down a treat in the kids lunch boxes.
Sushi Lunch Box Recipe
I used the recipe from the booklet which came with our rice cooker. Ingredients: 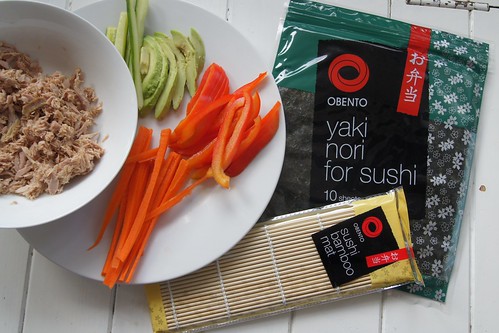
- 3 cups (rice cooker measuring cups) sushi rice
- 3 cups (rice cooker measuring cups) water
- 1/3 cup rice vinegar
- 2 1/2 tablespoons sugar (I no longer add the sugar and the kids don’t notice!)
- 1/4 teaspoon salt
- 1 cucumber
- 3 carrots
- 1 red capsicum
- 1 avocado
- 95 grams tuna in springwater
- 6 sheets toasted seaweed (nori)
- Wasabi paste (optional)
- Soy Sauce (optional)
You will also need to have at least one bamboo mat. 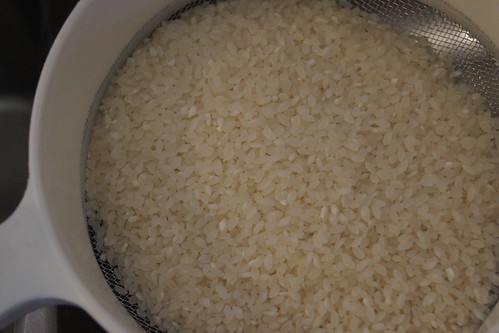 1. Rinse the rice until the water runs clear and then drain it for about 10 minutes.
 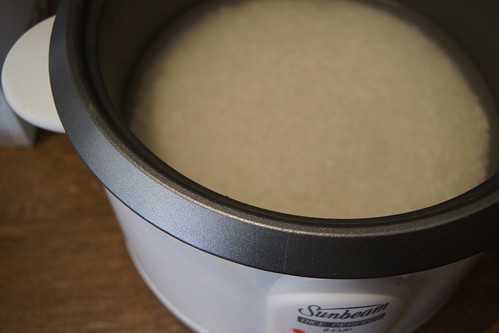 2. Add the rice to the rice cooker and pour water on top and cook with lid on. 3. While the rice is cooking, prepare the fillings for your sushi. In our case, it was to slice the capsicum, carrots and cucumber. Deseed the avocado and slice it thinly. Drain tuna and break it up. 4. Once the cooking cycle has finished, leave it to sit on warm for at least 10 minutes.
 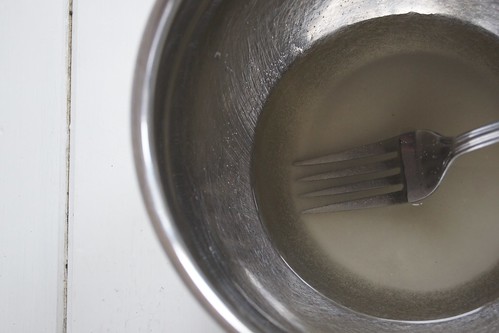 5. In a small bowl add the vinegar, sugar and salt. Whisk with a fork until well combined and sugar dissolves.
  6. Once rice has been sitting for 10 minutes, scoop it out using a rice spoon into a flat bottomed container. You are not supposed to use metal apparently. Spread the rice out and break up any clumps. 7. Pour the vinegar mixture slowly through the rice while still breaking the rice up.
 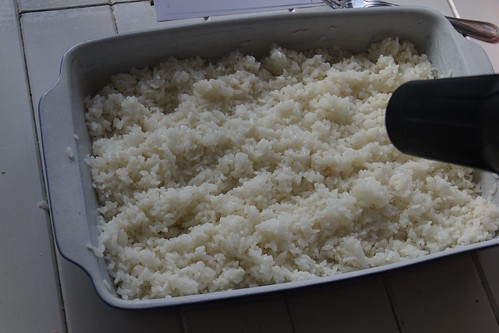 8. The instructions said to use an electric fan or low hand fan to cool the rice. I didn’t have either, so I used the cool setting on my hairdryer! As you cool the rice, you continue to gently move the rice about. 9. Cover the rice with a damp tea towel. Dampen your mat and place the seaweed shiny side down on the mat. We had heard that putting plastic wrap on the mat worked well, but I actually just preferred it when the mat was damp.
 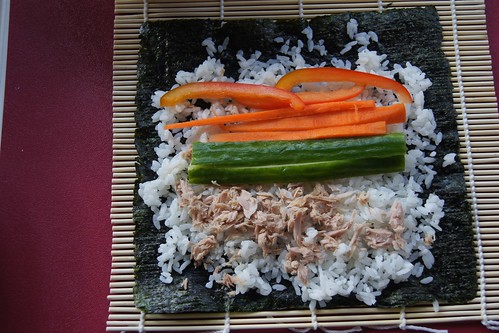 On our first go, we used the entire sheet of seaweed, but we (me!) had difficulty rolling it.
 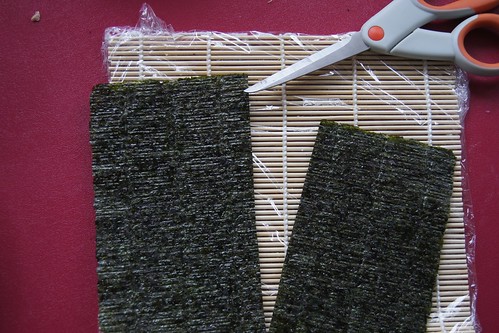 So we got a little creative and cut the seaweed into a smaller size piece and found this a much more manageable way to go.
 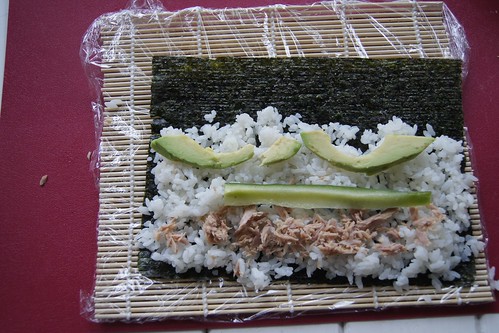 10. Dip your fingers into some water and spread rice evenly over the seaweed. Add your fillings on top of the rice. Leave a space at the top so you can seal the roll.
 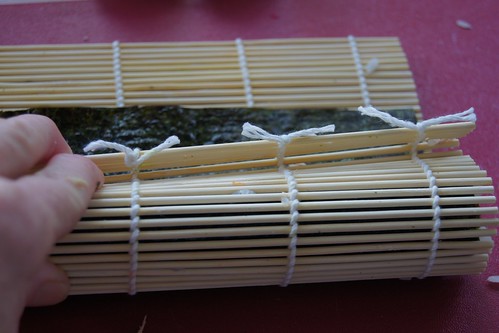 11. Roll the mat forward, keeping the roll tight and moving the mat out of the way as you roll. Wet the end of the seaweed, so you can seal the roll together.
  12. If desired cut the sushi roll into small pieces.
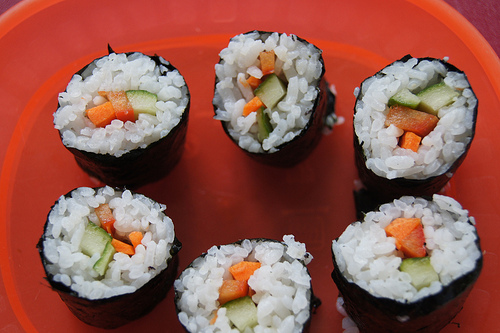
 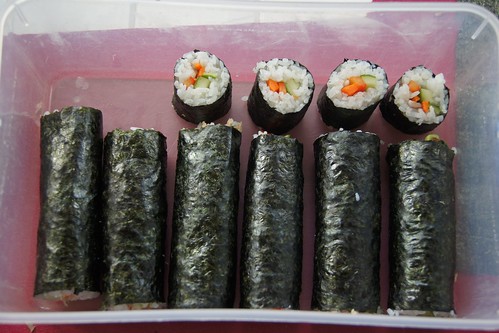 13. We did a combination of small pieces and larger rolls. I kept them in an airtight container in the fridge overnight.
 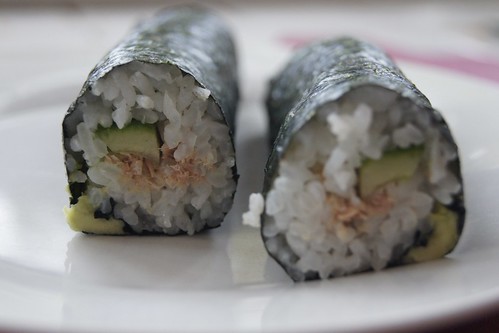 We made about 12 medium sized rolls.
Have you tried making your own sushi? How did you go with it?
- 3 cups (rice cooker measuring cups) sushi rice
- 3 cups (rice cooker measuring cups) water
- ⅓ cup rice vinegar
- 2½ tablespoons sugar (I no longer add the sugar and the kids don't notice!)
- ¼ teaspoon salt
- 1 cucumber
- 3 carrots
- 1 red capsicum
- 1 avocado
- 95 grams tuna in springwater
- 6 sheets toasted seaweed (nori)
- Wasabi paste (optional)
- Soy Sauce (optional)
- You will also need to have at least one bamboo mat.
- Rinse the rice until the water runs clear and then drain it for about 10 minutes.
- Add the rice to the rice cooker and pour water on top and cook with lid on.
- While the rice is cooking, prepare the fillings for your sushi. In our case, it was to slice the capsicum, carrots and cucumber. Deseed the avocado and slice it thinly. Drain tuna and break it up.
- Once the cooking cycle has finished, leave it to sit on warm for at least 10 minutes.
- In a small bowl add the vinegar, sugar and salt. Whisk with a fork until well combined and sugar dissolves.
- Once rice has been sitting for 10 minutes, scoop it out using a rice spoon into a flat bottomed container. You are not supposed to use metal apparently. Spread the rice out and break up any clumps.
- Pour the vinegar mixture slowly through the rice while still breaking the rice up.
- The instructions said to use an electric fan or low hand fan to cool the rice. I didn't have either, so I used the cool setting on my hairdryer! As you cool the rice, you continue to gently move the rice about.
- Cover the rice with a damp tea towel. Dampen your mat and place the seaweed shiny side down on the mat. We had heard that putting plastic wrap on the mat worked well, but I actually just preferred it when the mat was damp.
- On our first go, we used the entire sheet of seaweed, but we (me!) had difficulty rolling it.
- So we got a little creative and cut the seaweed into a smaller size piece and found this a much more manageable way to go.
- Dip your fingers into some water and spread rice evenly over the seaweed. Add your fillings on top of the rice. Leave a space at the top so you can seal the roll.
- Roll the mat forward, keeping the roll tight and moving the mat out of the way as you roll. Wet the end of the seaweed, so you can seal the roll together.
- If desired cut the sushi roll into small pieces.
- We did a combination of small pieces and larger rolls. I kept them in an airtight container in the fridge overnight.
- We made about 12 medium sized rolls.