

I have seen a number of different glow jars on Pinterest and had thought I would save making them for our winter solstice celebration. The winter solstice is also Mr I’s birthday, so they would be lovely and festive for the occasion.
Before we made the glow jars, we had a quick look at the science behind them. The glow jars work using the liquid from the glow sticks.
- A glow stick is made up of two chemicals.
- You know the crunching sound you here when you snap a glow stick to make it glow? What you are actually hearing is the glass breaking of the smaller vial inside the plastic tube. The glass vial contains a chemical called hydrogen peroxide.
- Once the glass vial is broken it mixes with the other chemical in the plastic tube called phenyl oxalate ester plus a fluorescent dye solution.
- The chemical reaction of these two chemicals is energy released in the form of light.
- The fluorescent dye accepts this energy and converts it into a pure light called chemiluminescence.
So with that now known here is how we made them.
How to make glow jars
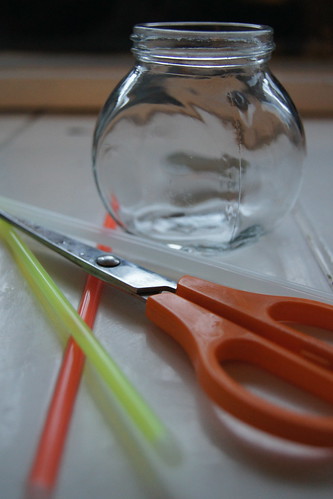
You will need:
- Jars – You could use jars without a lid if you wished. You would just need to be more careful when shaking the mixture around without a lid.
- Glow sticks – we used 3 glow sticks per jar.
- Scissors – not your good ones!
- Gloves – optional we didn’t use them and just had a cloth to wipe our hands.
- Apron – the kids can make a mess, so best not to have your best clothes on in case you get flicked with the dye.
I did a test run with these before making them with the kids and tried a few different ways, but in the end with this very simple method. The glow jars won’t glow for a super long time. Ours glowed beautifully for about an hour, then died away. Temperature affects how long they glow for. Cold temps will see them glow for longer and high temps will see them glow brighter for shorter periods of time.

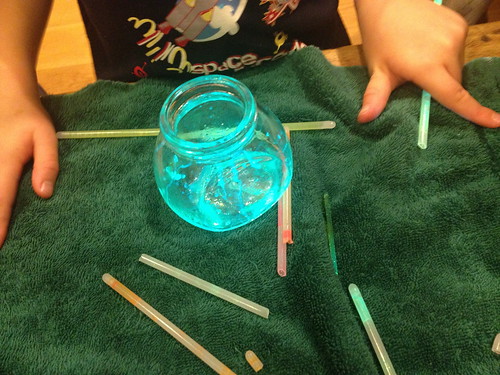
Snip the end of the glow stick and then shake the stick vigorously with the cut end in the jar. I found it best not to break up the glow stick first.
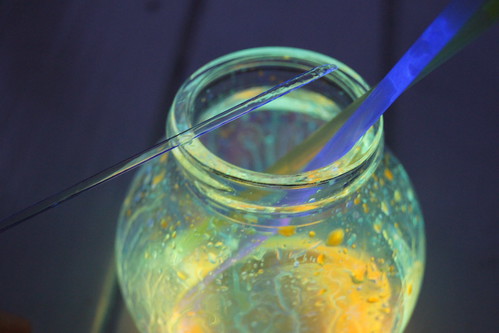
In the photo above you can see the inner glass vial. If you snap the glow stick first, the liquid gets blocked by the shattered glass. As this is glass, if you do this activity with the kids you will need to supervise very carefully.
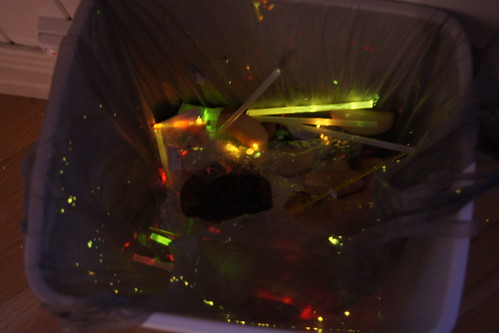
Have a bin nearby so you can pull out the glass vial and place it in the bin. Once you remove the glass vial the liquid comes out pretty easily. It is also good to have a damp cloth close by as well for any accidents that might occur with spilling of the dye.
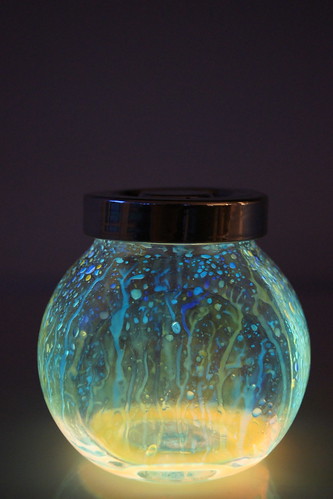
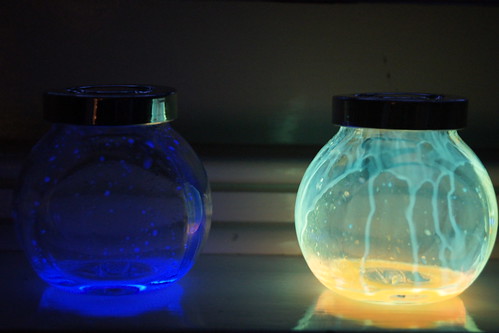
Pop the lid on shake it gently from side to side and admire your glow jar!
When the kids made their glow jars, we set up the area with an old towel underneath to soak up any spills. The kids didn’t snip the ends off as gently as I did and when we turned off the lights there was specks of dye everywhere! If you wipe them up ASAP they clean up okay, just make sure they aren’t working in an area that has precious fabrics etc.
We made these glow jars as decorations for Mr I’s birthday dinner and we were all very happy with the way they turned out:
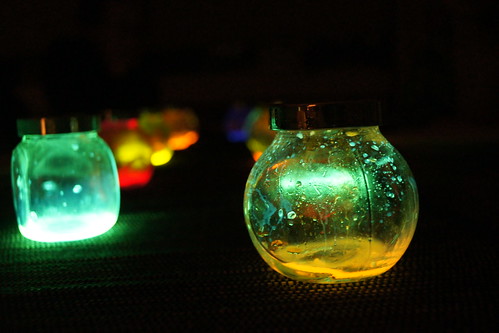

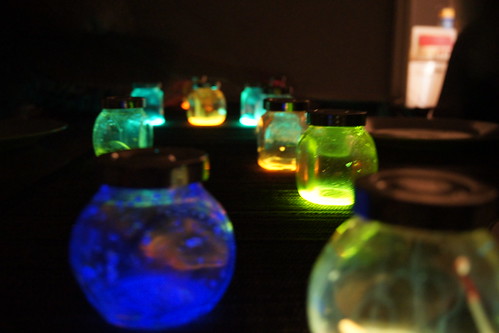
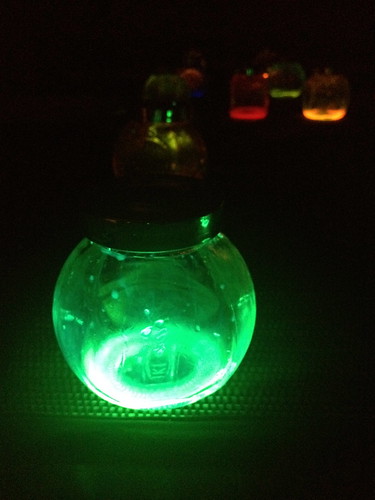
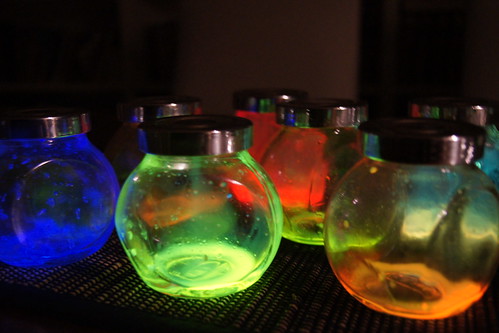
The photo above was taking about 1 hour and 30 minutes after we made the glow jars. Some had much more glow than others, but all had decreased in intensity.
There are other ways to make glow jars, like using the fluorescent dye from highlighters, fluorescent paint etc – have you tried making glow jars?
This post was the last of my post for the 21 Challenge. I am very proud to say that together we have exceeded my goal of $500 and raised $693. If you enjoyed the posts, it is not too late to sponsor me in my 21 Challenge. Donations are tax deductible and can be made securely online here. Thanks!